Midjourney is an incredibly popular AI image generator. One which became so popular that it had to stop its free trials after several deepfakes of real-life people began circulating – including Donald Trump. But despite its fully paid subscription model, it still remains one of the top used generators with a wide variety of styles and types.
There’s even an official discord that’s used to facilitate the image generation. Due to that, it can be tricky to figure out how to properly use the tool, but this guide will lead you through the process. And once you understand how to do it, it’ll become like second nature to create your own images.
Steps for how to use Midjourney
- Join the Discord server
- Complete the tutorial
- Make an account
- Start creating images or breaking down images into text
Step by step guide – Signing up for Midjourney
1. Join the official Discord server
(Image: © Future)
You first need to join the official Discord, which can be found here. You either need to make a brand new Discord account or sign in to your existing Discord account.
2. Complete the tutorial
(Image: © Future)
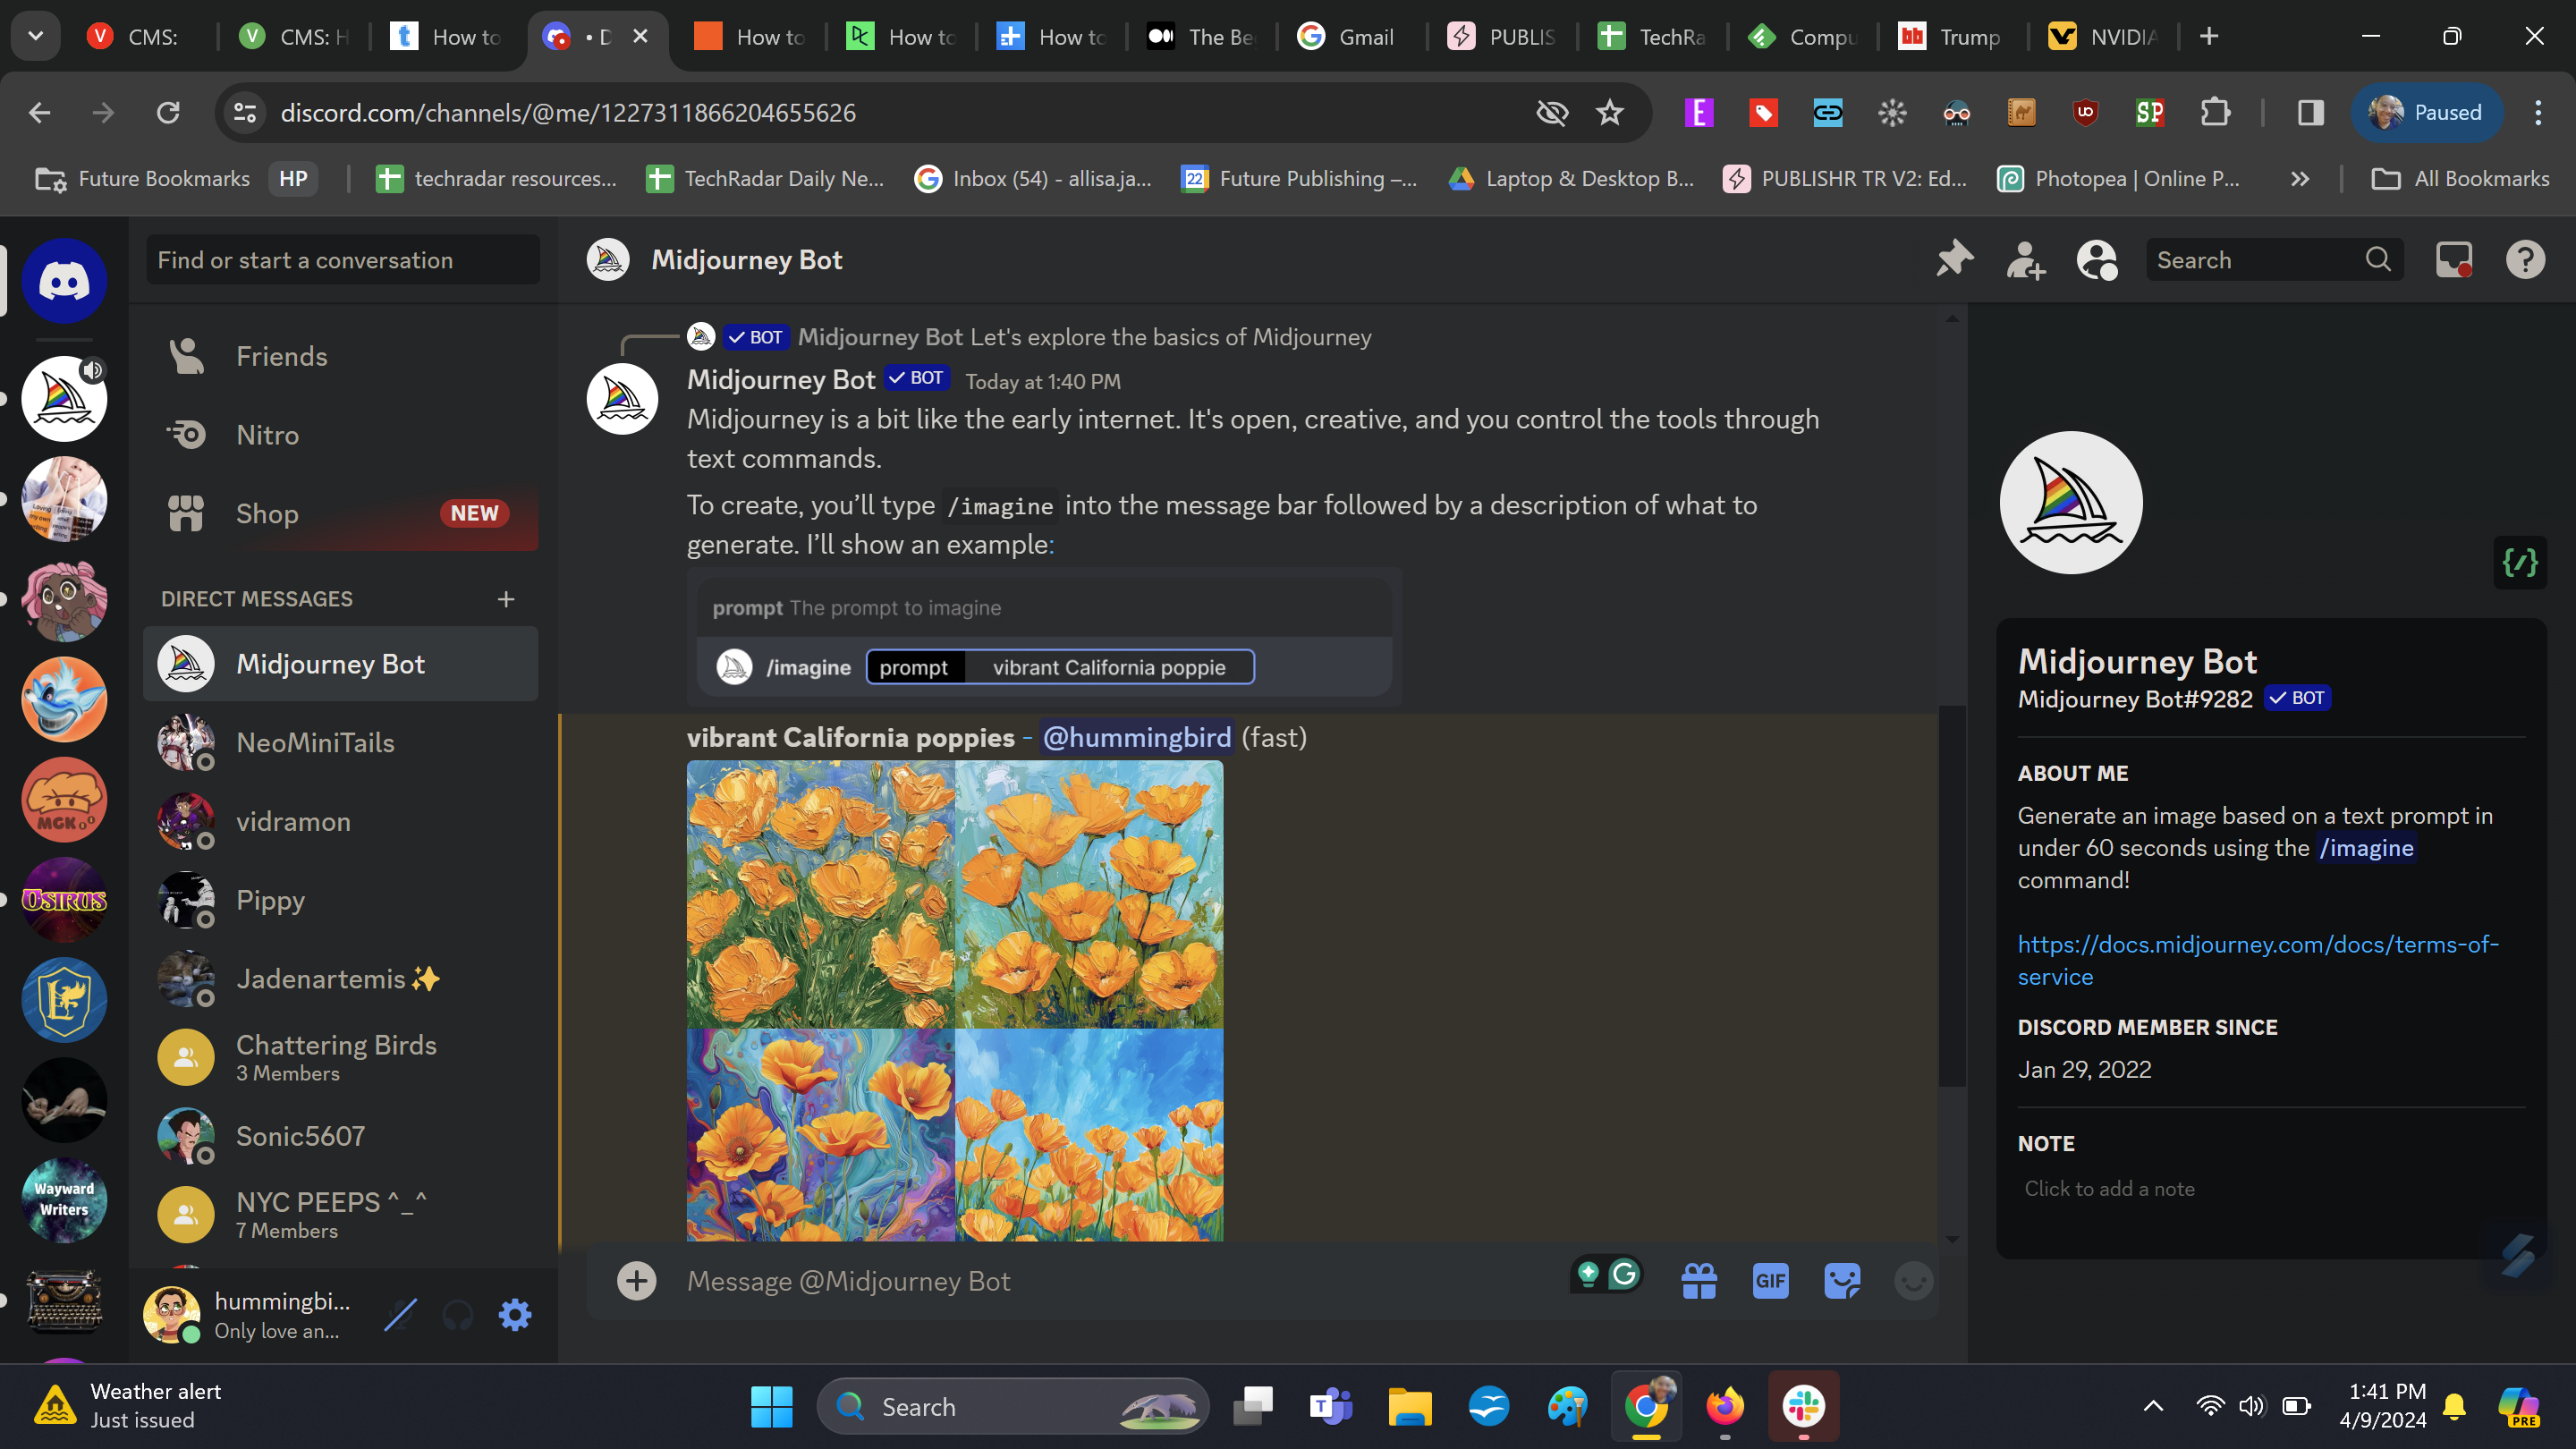
Once you join the Discord server, there’s an optional tutorial that the Midjourney bot will run by you. However, it’s a great way to introduce yourself to the basic functions.
3. Choose your subscription plan
(Image: © Future)
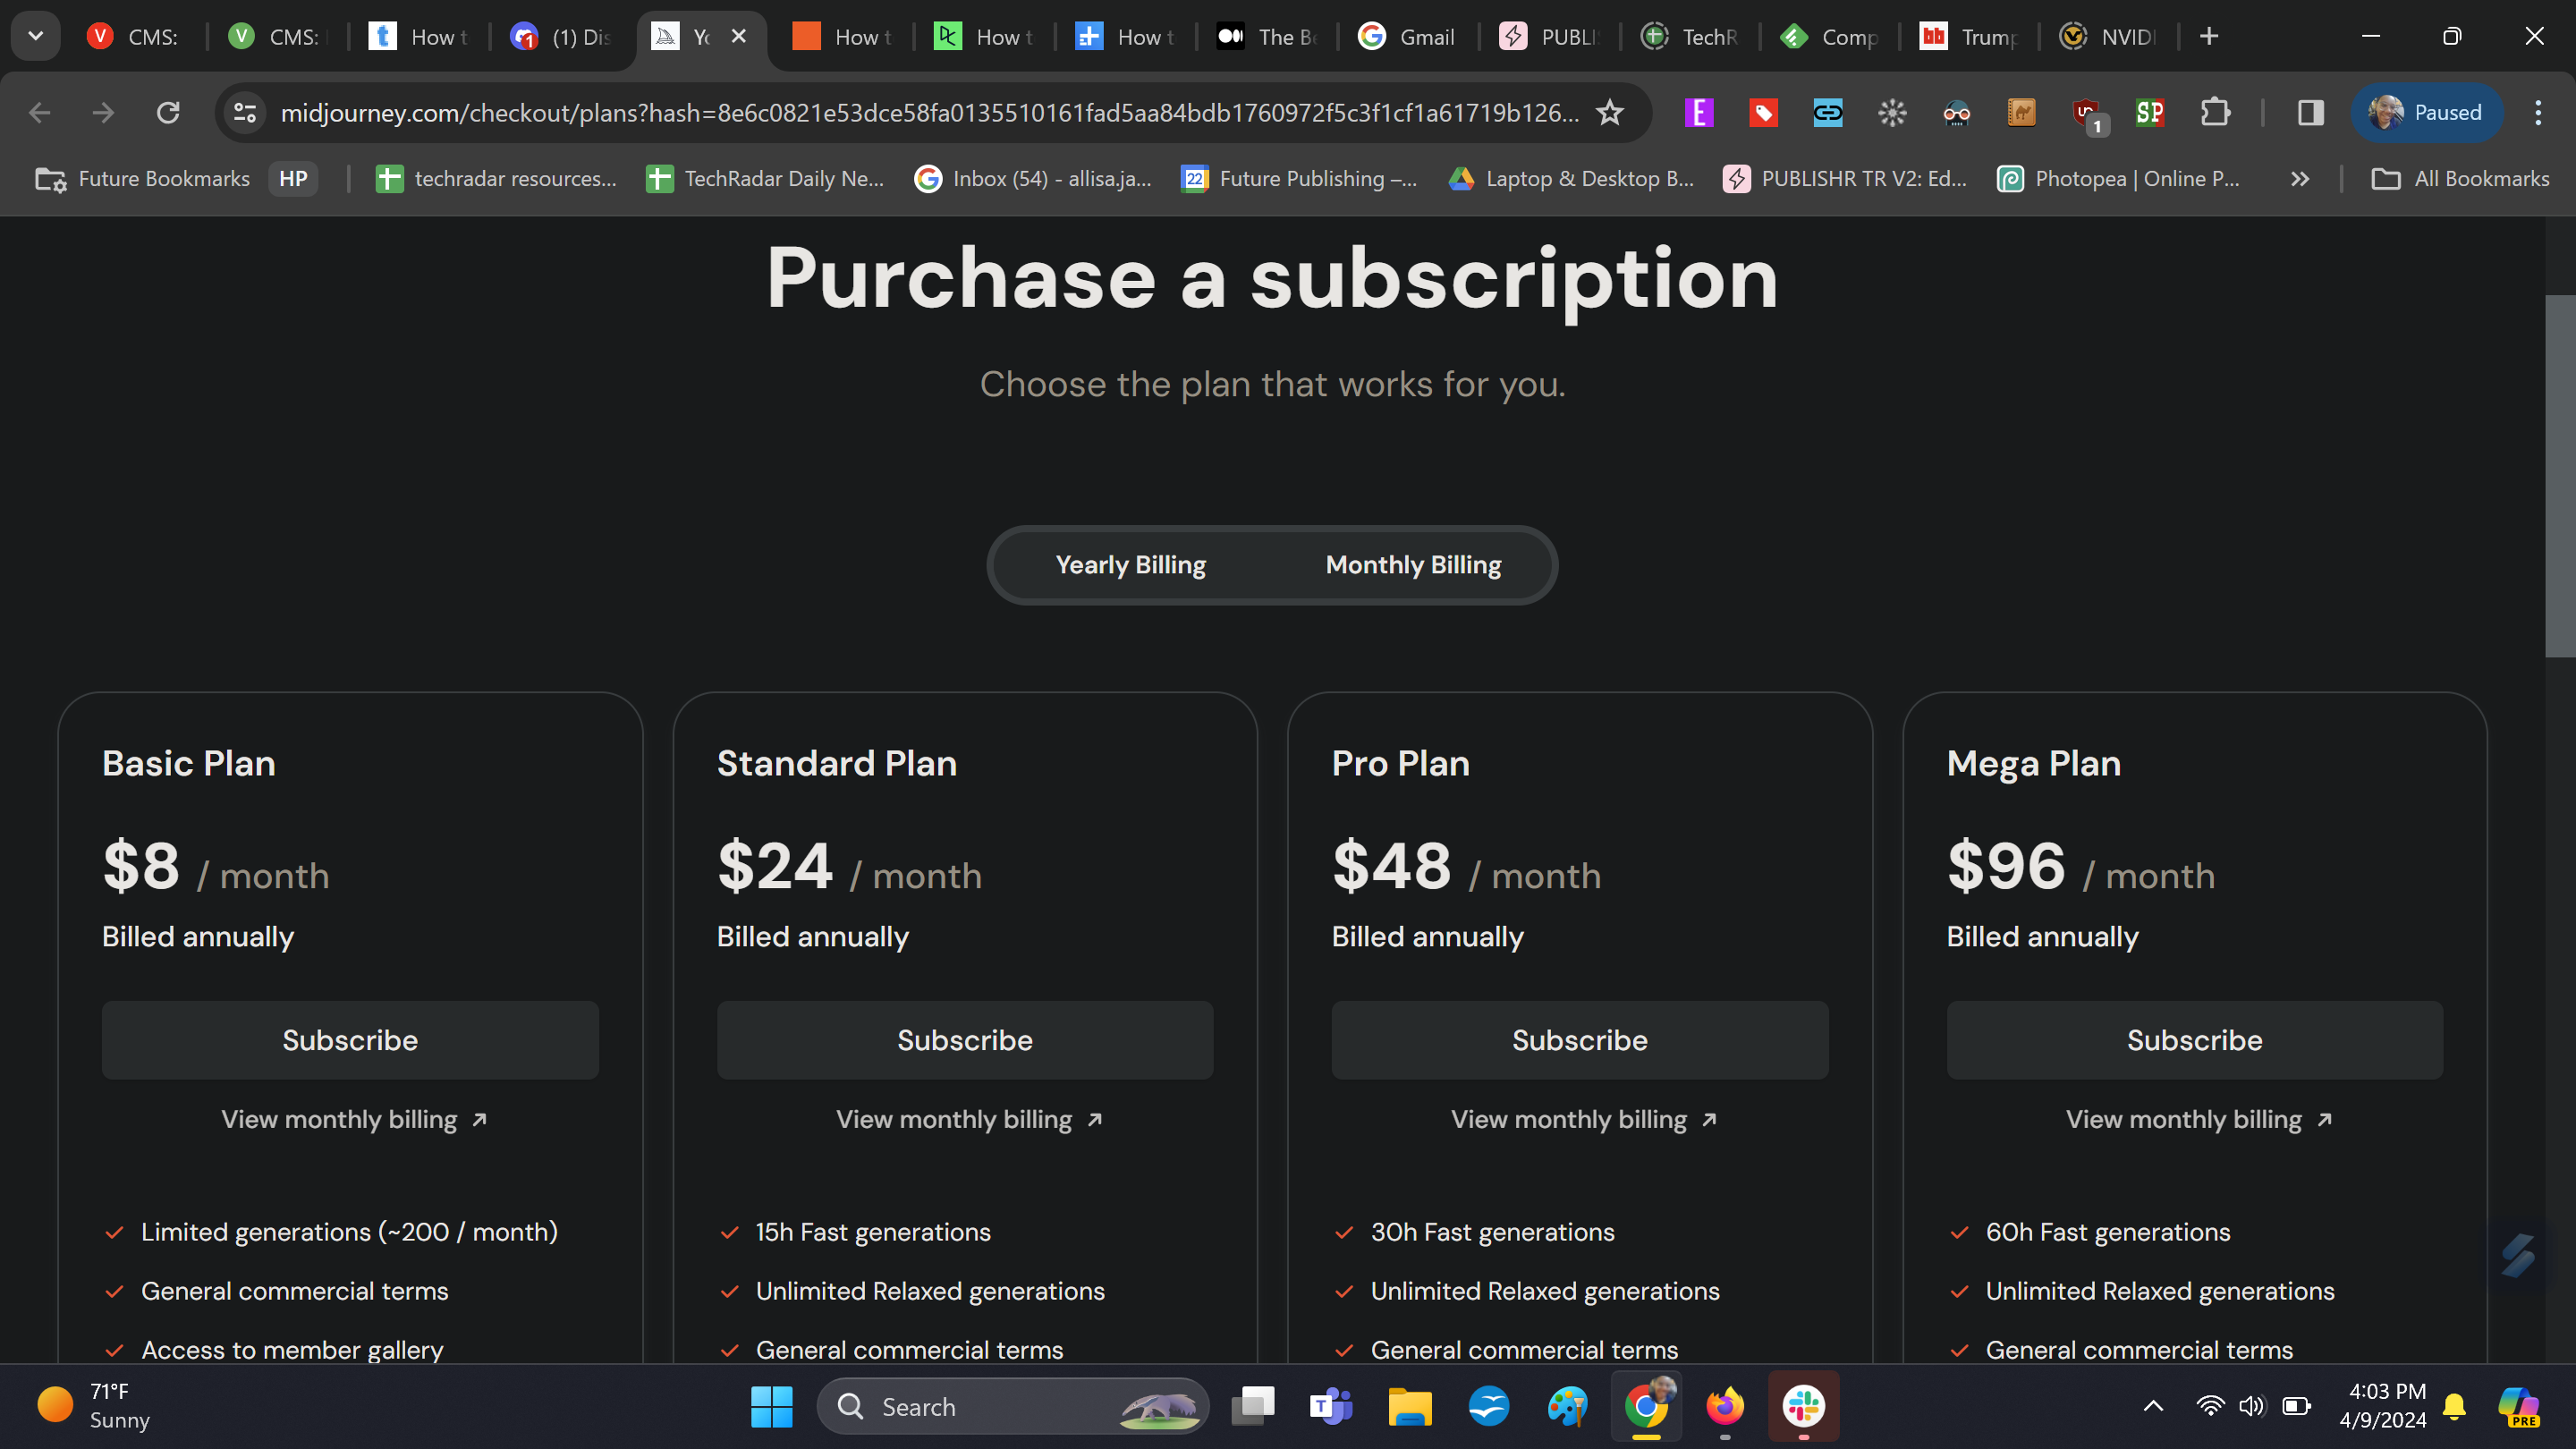
After the tutorial and at any time by going into a Discord channel and prompting, you can choose your payment plan. Midjourney used to offer a free trial but now the minimum subscription pricing is $10 per month for the Basic Plan.
There’s also a Standard Plan for $30, the Pro Plan for $60, and the Mega Plan for $120. Each tier offers a progressively faster GPU time as well as maximum concurrent jobs, while the higher tiers offer other features like relaxed GPU time and stealth mode.
Step by step guide – Text to image
1. Enter image prompt in creation channel
(Image: © Future)
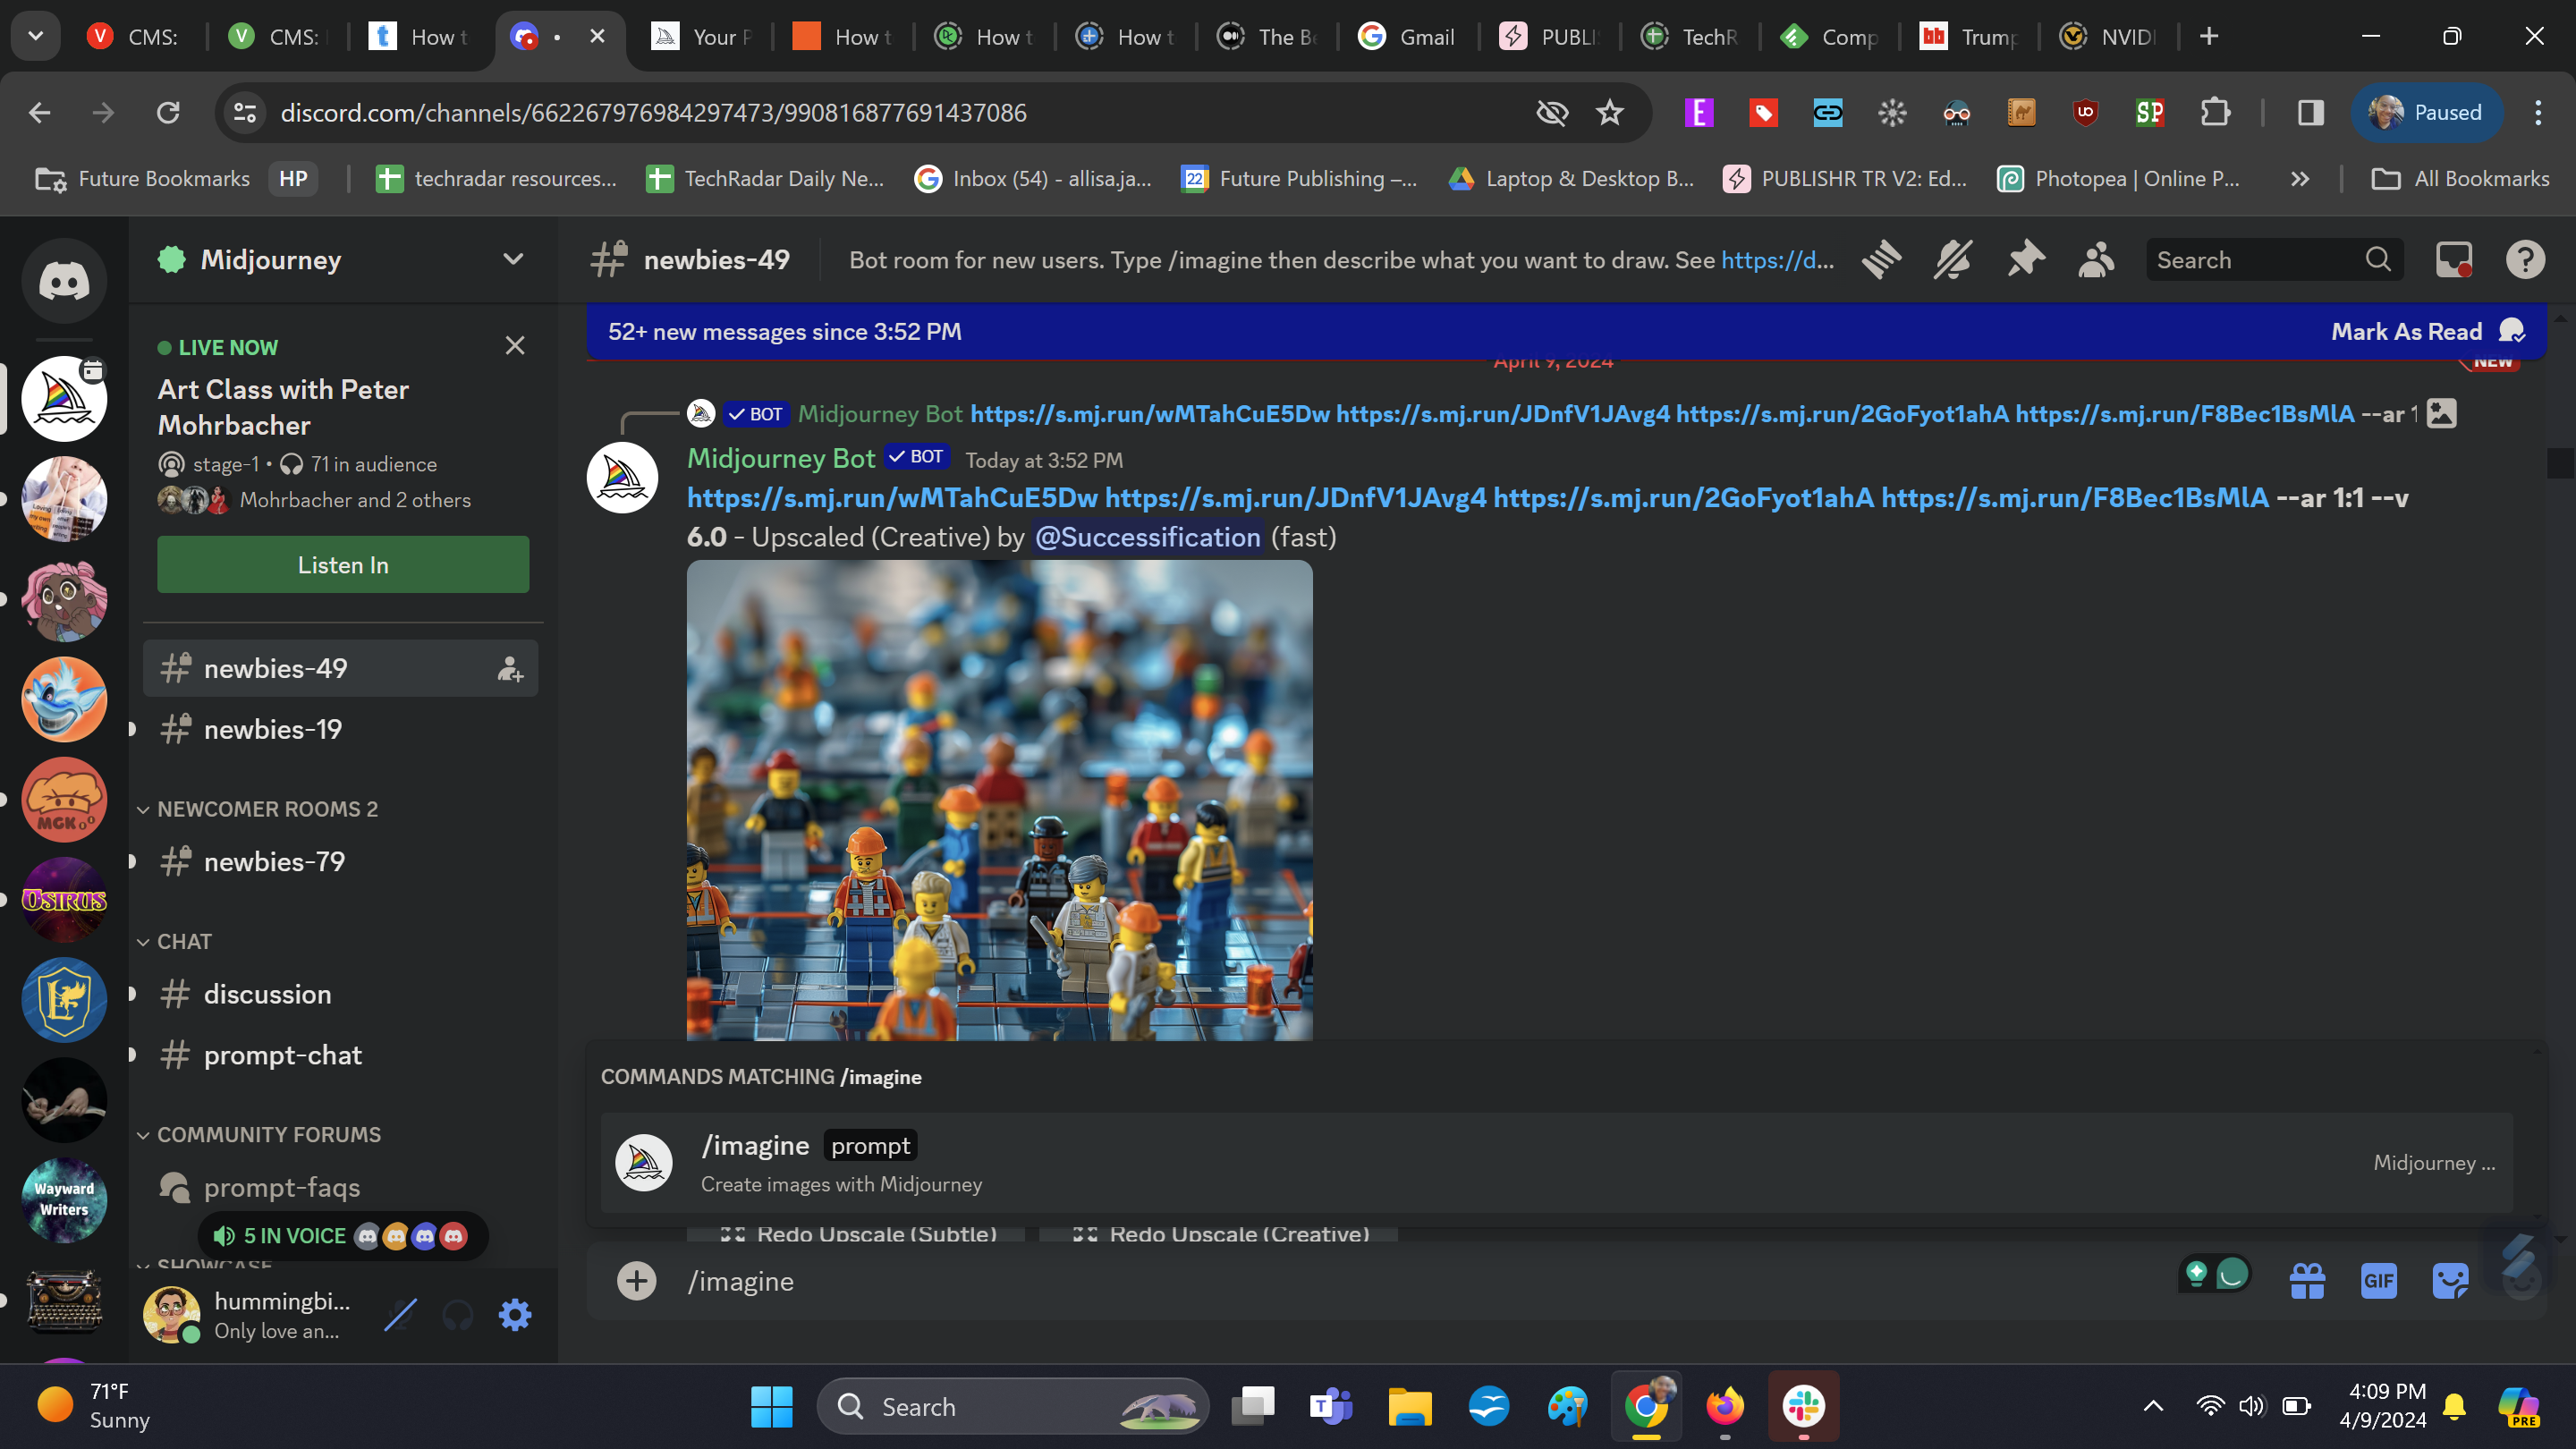
If you’re first starting out, it’s best to go to one of the designated newbie channels, which is much easier to navigate than the main channels. Select the chat box at the bottom and type /image, then type out the kind of image you want generated.
2. Alter or edit images
(Image: © Future)
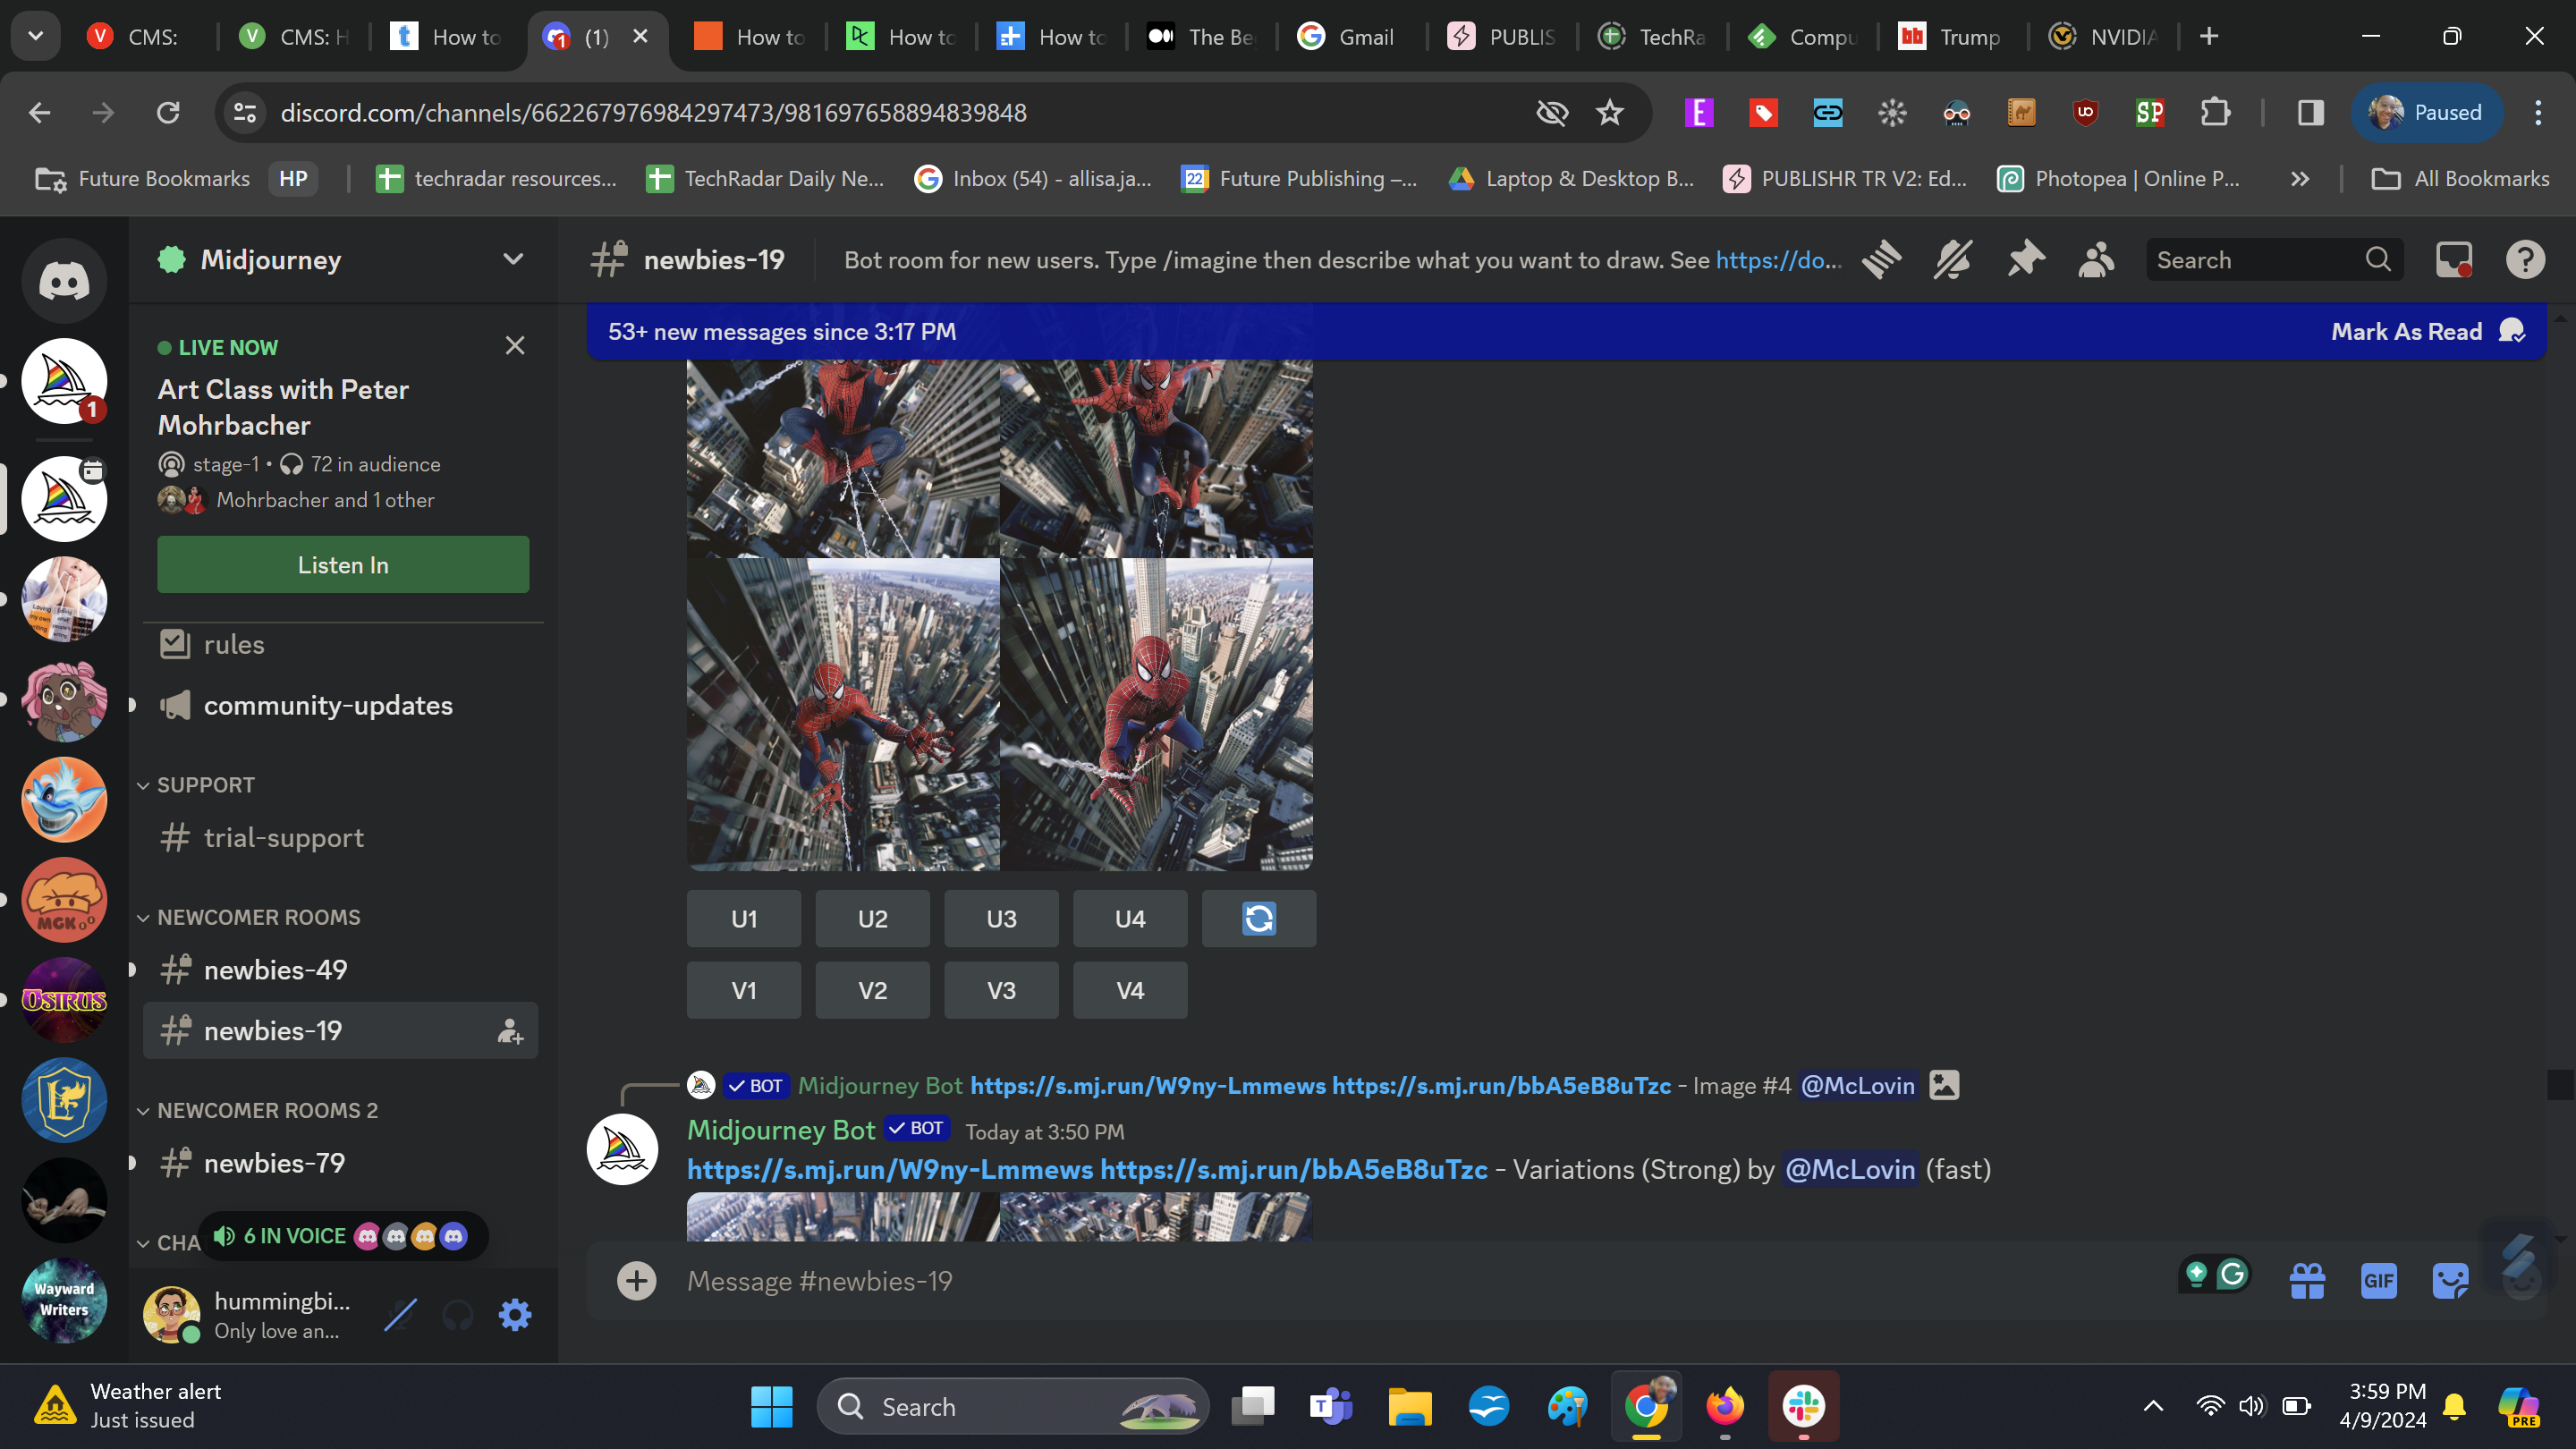
There should be several versions of your prompt that appear. From there you can choose one to upscale or zoom out on. V (and then the number of the photo) stands for variation and U stands for upscale.
Step by step guide – Image to text
1. Enter text prompt in creation channel
(Image: © Future)
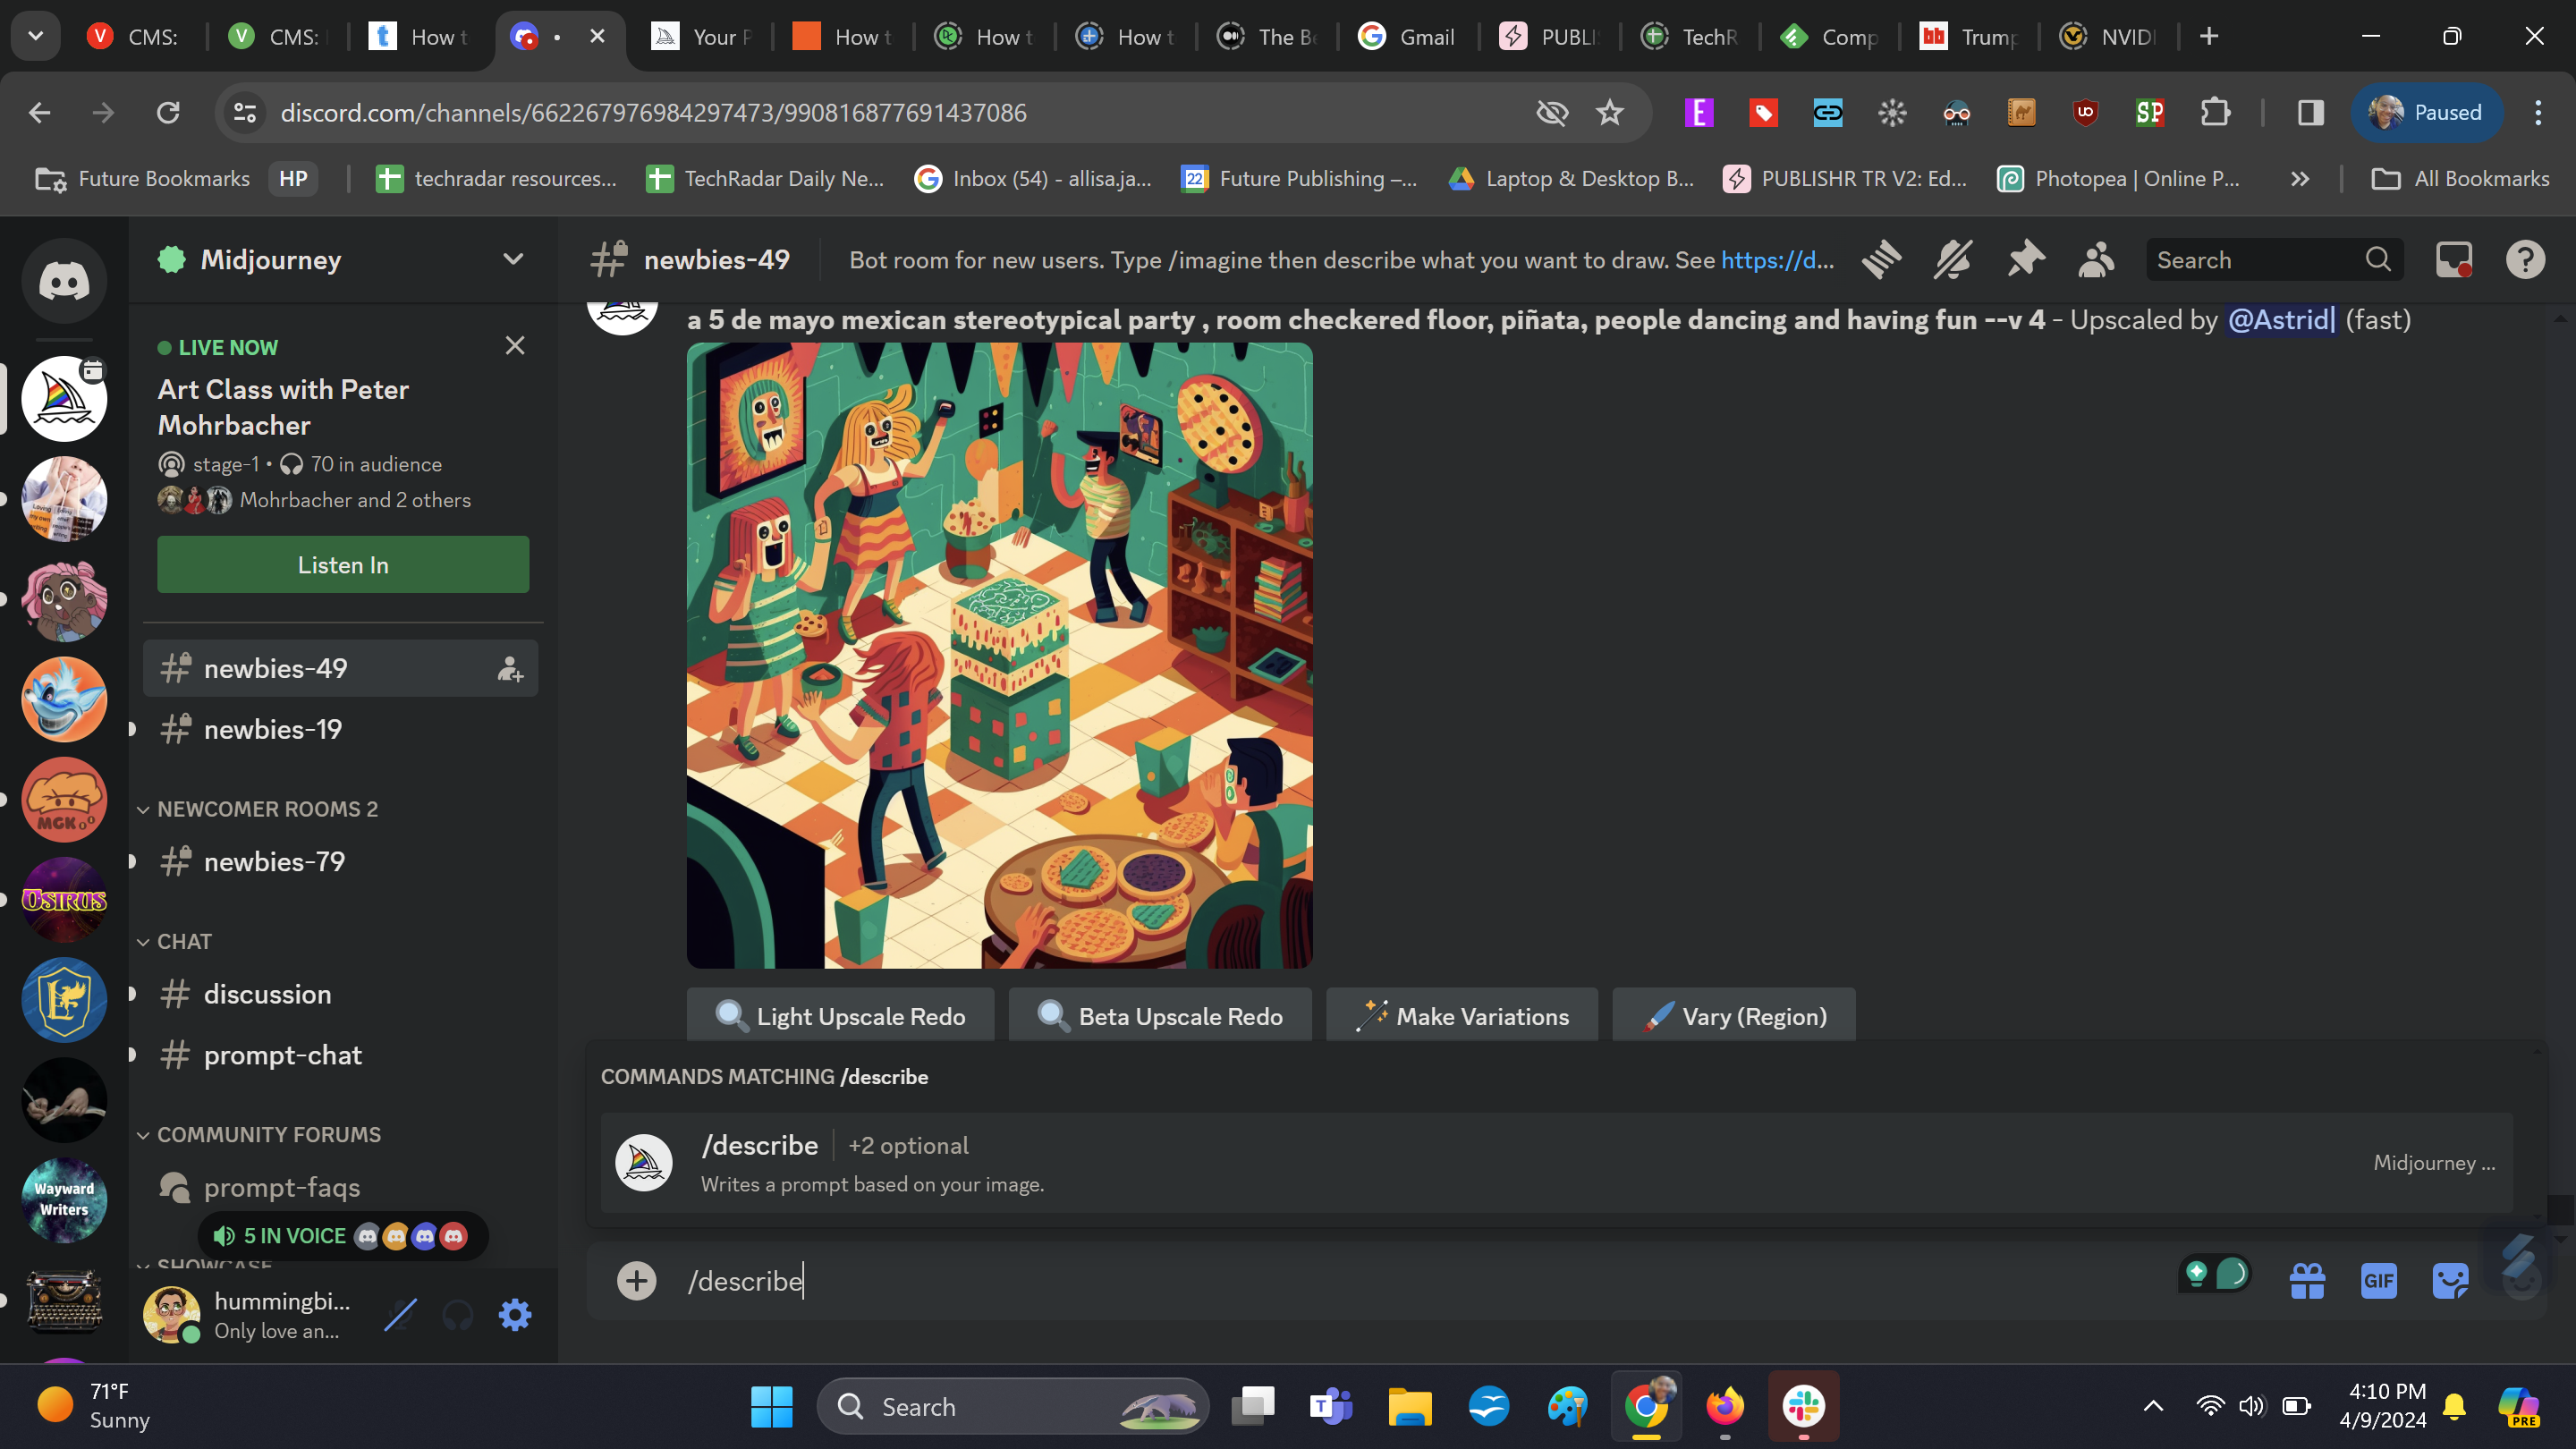
If you’re first starting out, it’s best to go to one of the designated newbie channels, which is much easier to navigate than the main channels. Select the chat box at the bottom and type /describe, then attach the image you want described and upload it.
From there, several options with different sets of text will appear, so you can simply choose which matches best.
Final thoughts
Midjourney is a unique experience in terms of AI image generators, as it actively builds a community around the creation of images. And though it has a higher learning curve than other AI generators, the level of customization and sheer range of kinds of images make it more than worth the effort.
However, one aspect of Midjourney that could be throttling its growth potential is that there’s no free trial. Currently, there’s work trying to find a proper balance between allowing free subscriptions and preventing abuse but as of now, you need to pay. And for those who can’t afford such, they’ll most likely move onto free generators instead.


